Empty and refill EcoTank, change ink

With an EcoTank printer, the inks in the tanks and the lines can be easily replaced with a few simple steps. This process is necessary if you want to switch from the original Claria® dye inks to farbenwerk Pigmera ETX or Carbonprint carbon pigment inks.
After changing the inks, it may be necessary to start a nozzle cleaning process several times, which consumes a lot of ink. This is because the adapter cartridges on the print head are still filled with the "old" ink. If you switch from color inks to Carbonprint gray inks, the procedure takes even longer. You have to print or clean until "neutral, color-free" ink is output from the nozzles of the print head. It may take a while to reach this point. Experience shows that it takes the longest for the "Yellow" ink channel to rub off the last traces of yellow dye from the inside of the ink tubes and to expel it from the ink channel nozzles.
Attention!
If you want to use Carbonprint inks in your EcoTank printer, we recommend filling a clean, new device with Carbonprint. This way, there will be no contamination in the tanks or inks. If you are using a used device and the printer is already filled with color inks, the process of switching to Carbonprint can be time-consuming and may take a while before a color-stable print with Carbonprint is possible.
Unfortunately, it is not possible to completely remove all the ink from the tanks using the described method, as a small amount of "old" ink will always remain in the tank. However, when switching from dye color (e.g., Claria®) to Pigment Pigmera ETX, this is not a problem. After removing as much dye ink as possible from the ink tank, we filled the tank with Pigmera ink to about 70%, raised the printer, and shook it gently to mix the remaining dye ink with the pigment ink. Then, the tank was completely drained and filled with dye ink. After all tanks were refilled, we performed about 6-8 nozzle cleaning cycles at intervals of approximately 15 minutes to complete the conversion from Claria® to Pigmera ETX.
When converting from dye color to Carbonprint grayscale, we also recommend filling the tank with 70% new ink after the first removal of the old ink and shaking the printer. This process should be repeated two additional times to ensure that any remaining color residue is almost completely removed. All drained ink should be disposed of properly.
At this point, we again recommend that you ideally fill an EcoTank printer with Carbonprint pigment inks using a clean, new device!
Change the ink
To suck and refill the ink, a syringe and an adapter are needed for each color channel, which is placed on the front of the syringe and fits the inner diameter of the ink tube.
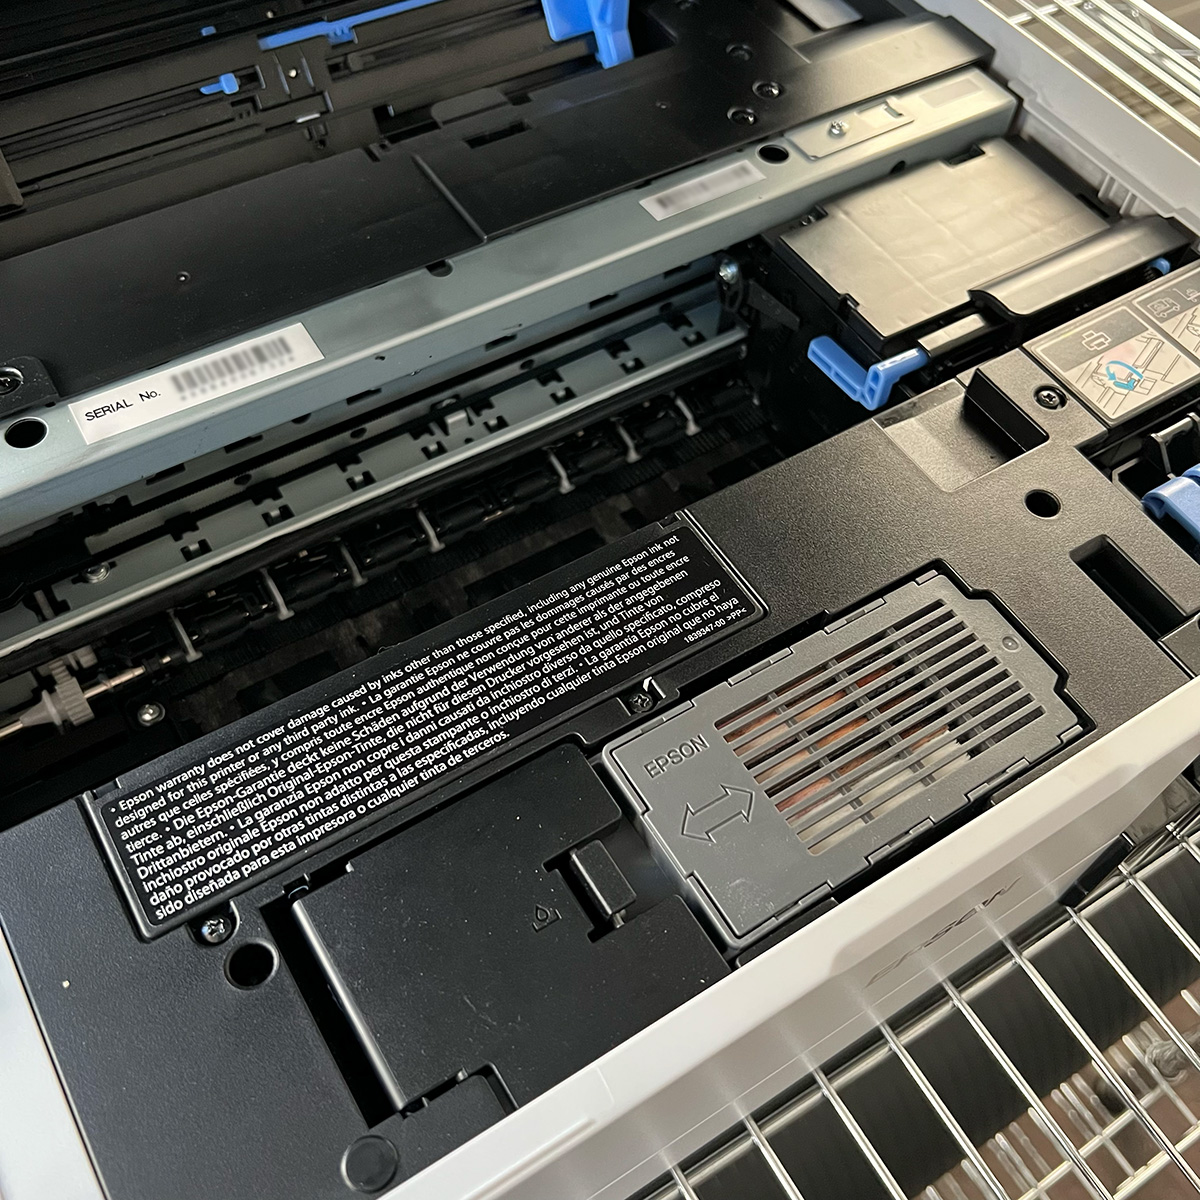
Open the cover of the printer, the print head is parked on the right side and is locked there by default, it cannot be moved. We want to change that. To do this, turn on the printer, after a few seconds the print head moves to the left, at this moment unplug the power cord of the printer at the back of the device. This makes it possible to move the print head manually.
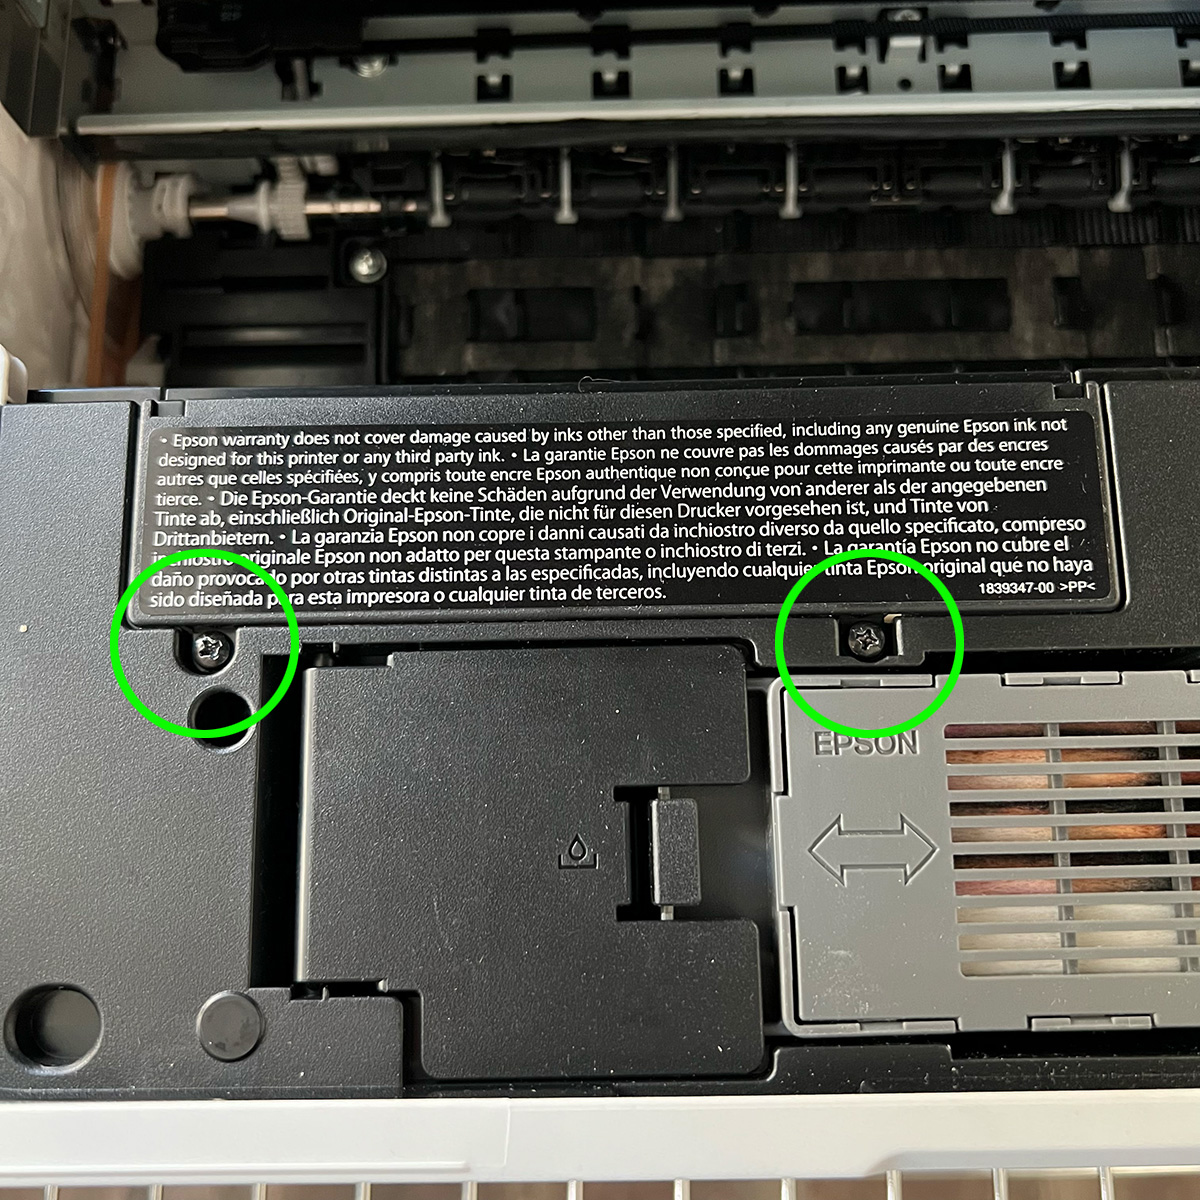
On the left side, there is a cover which is removed by loosening the two screws. This provides better access to the printhead.
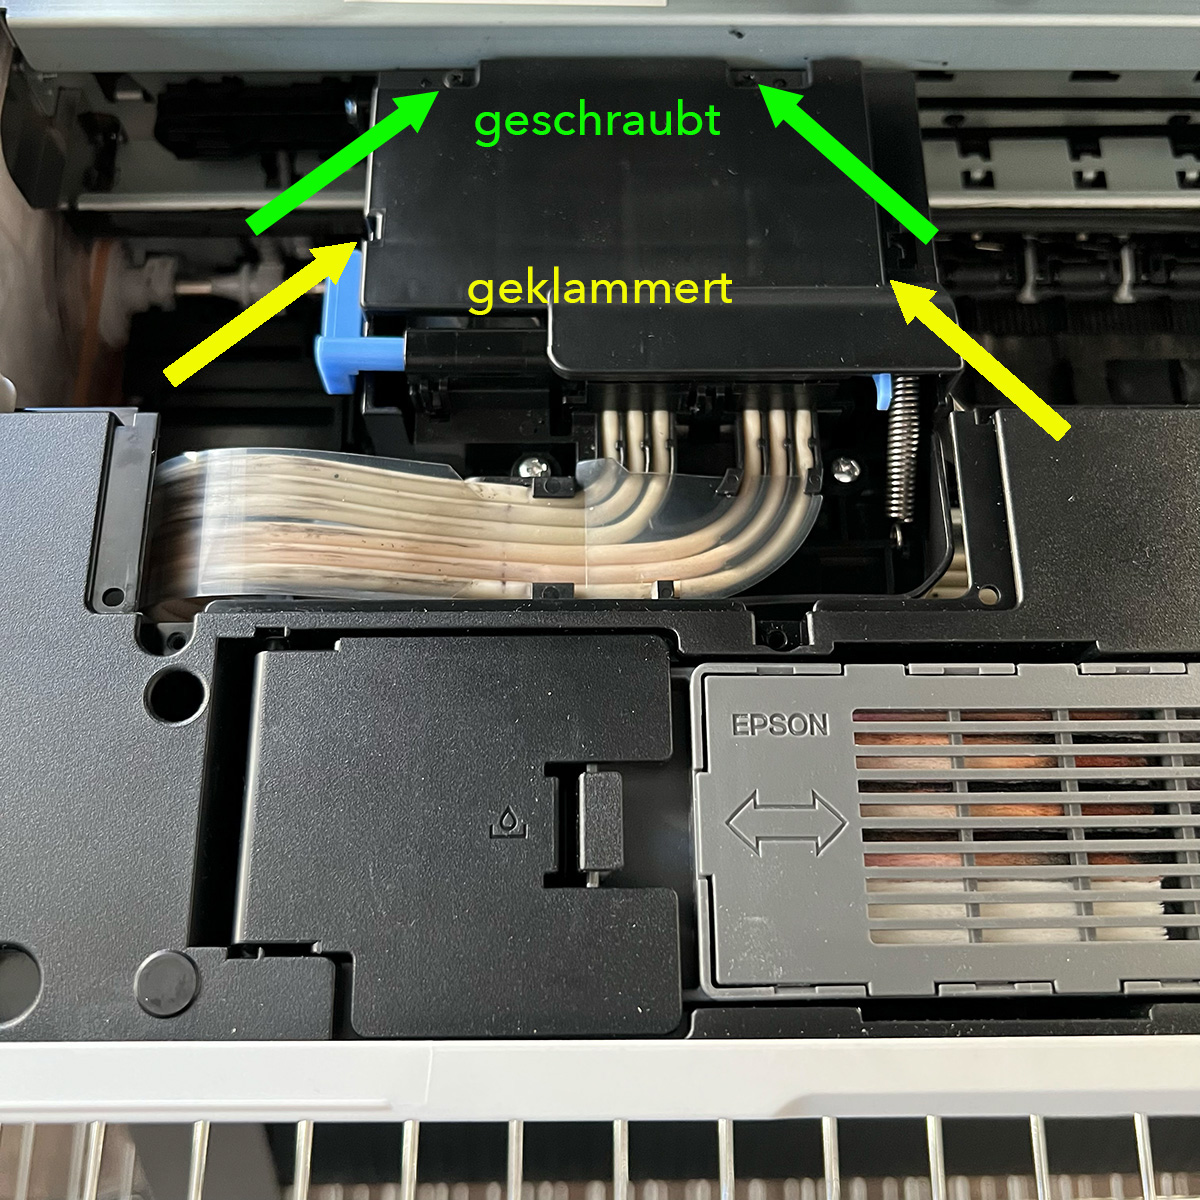
The cover of the print head carriage is removed by loosening the two upper screws (green arrows) and the cover is clipped at the bottom (yellow arrows).
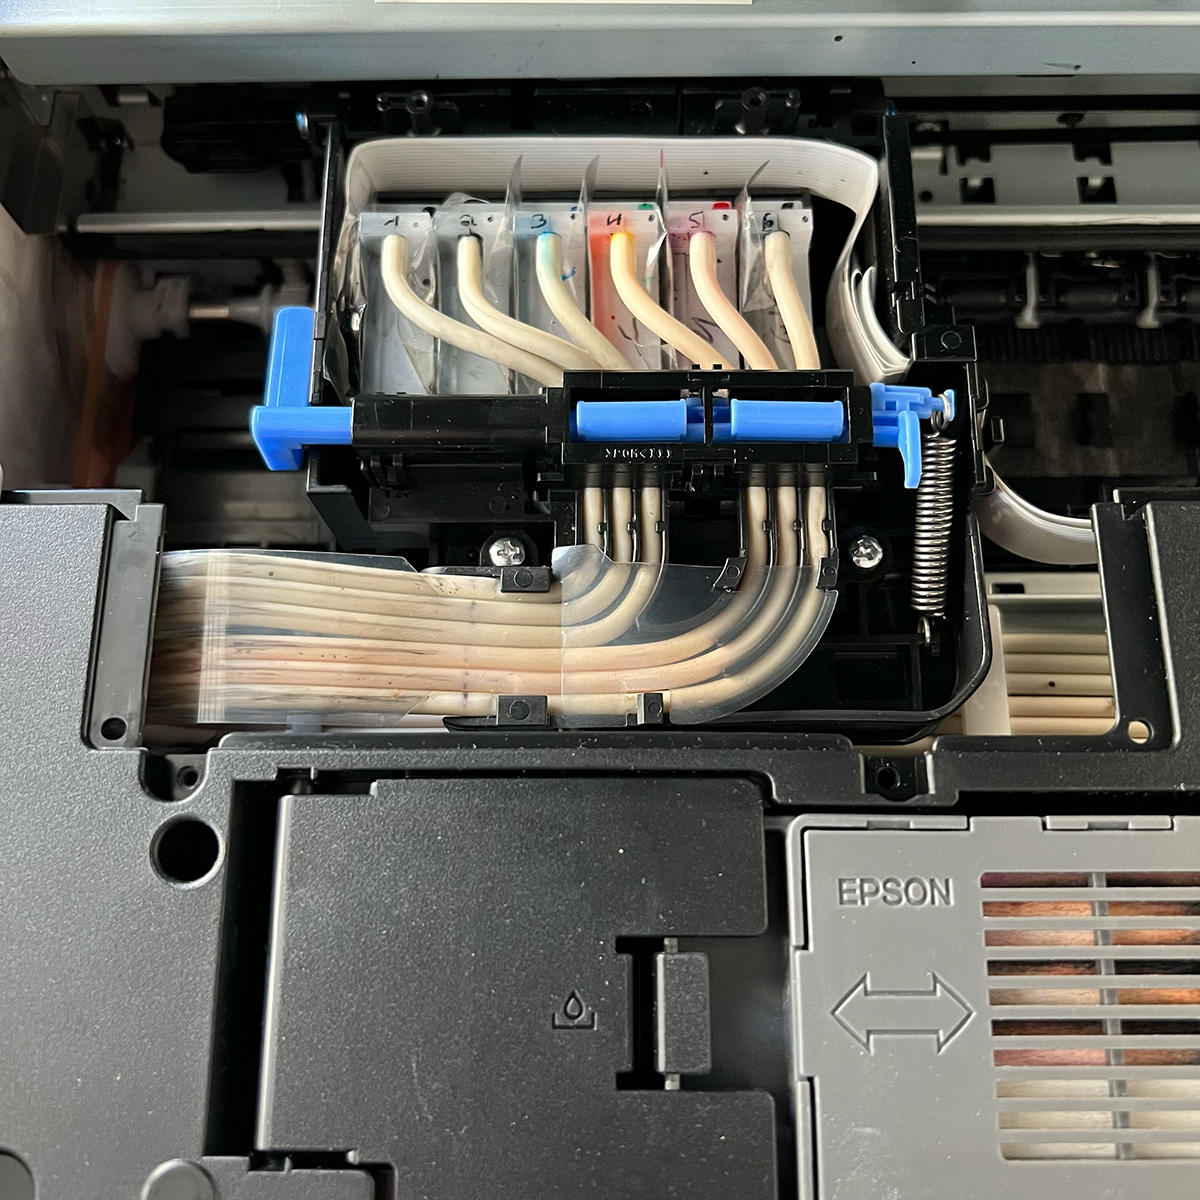
The cover is removed, providing free access to the hoses.
The order of the hose connections from left to right corresponds to the order of the ink tanks. Starting from the left, this is how to replace the "Matte-Black" color from the "BK" tank.
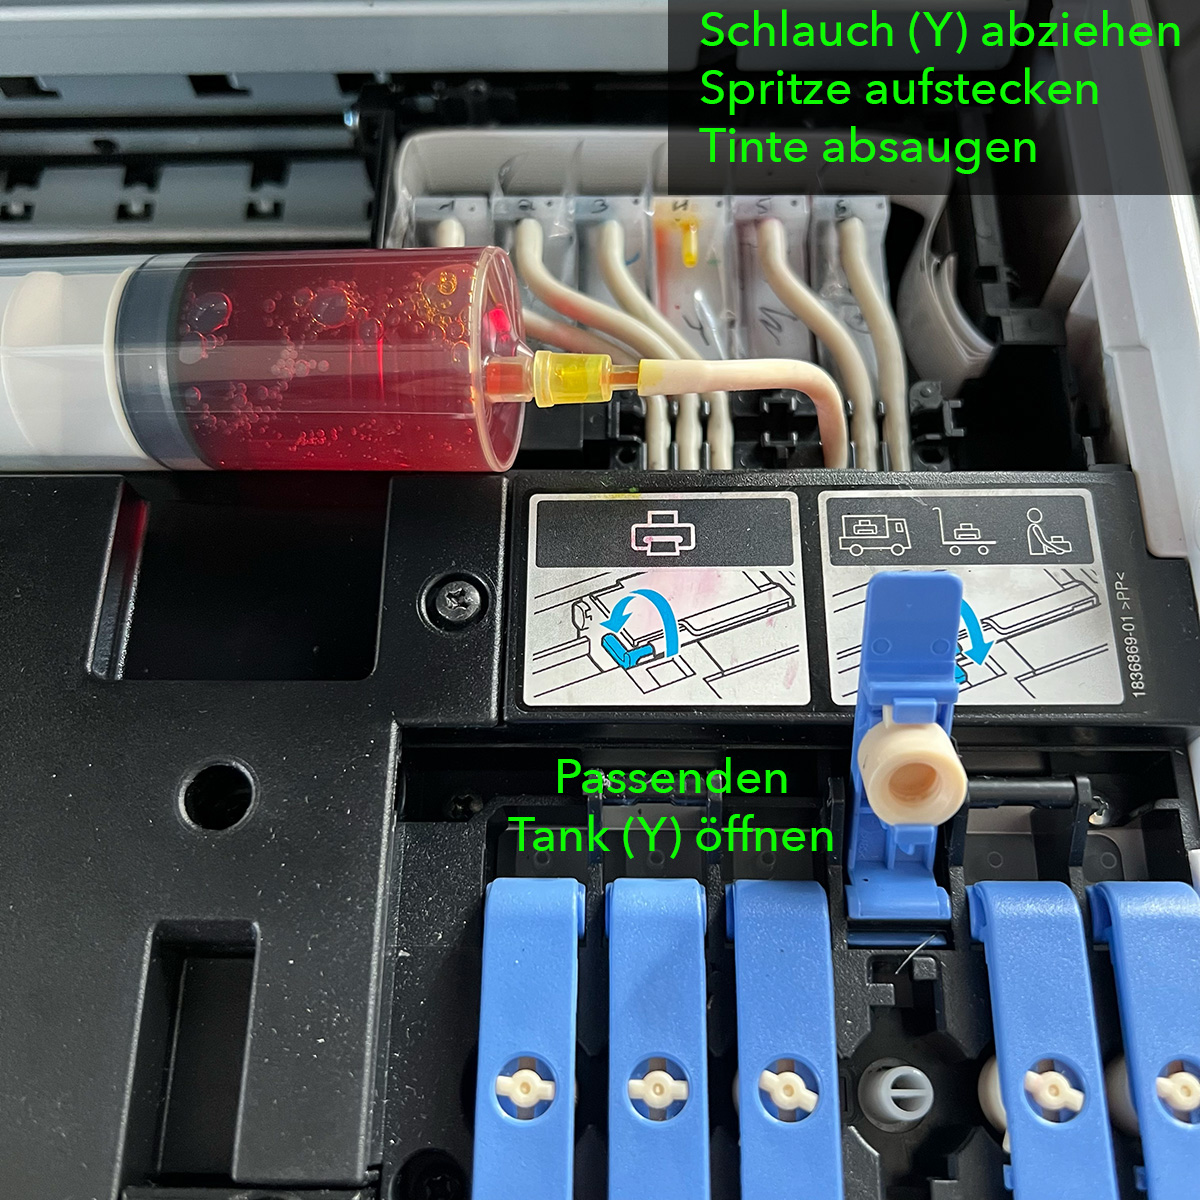
Example for the Yellow color channel "Y":
Disconnect the hose, insert the syringe with the attached adapter into the hose. Then open the lid of the corresponding ink tank "Y" and slowly suck out the ink as far as possible. Depending on the current fill level of the ink tank, it may be necessary to repeat the process several times until the tank is empty. Once the tank is empty, fill it with new ink in the same way. So, attach the cleaned and filled syringe to the hose and slowly fill it with new ink. When switching to Pigmera ETX or Carbonprint, fill the tank once, shake the entire printer back and forth, and then completely suck out the ink again. For Carbonprint, repeat this process several times.
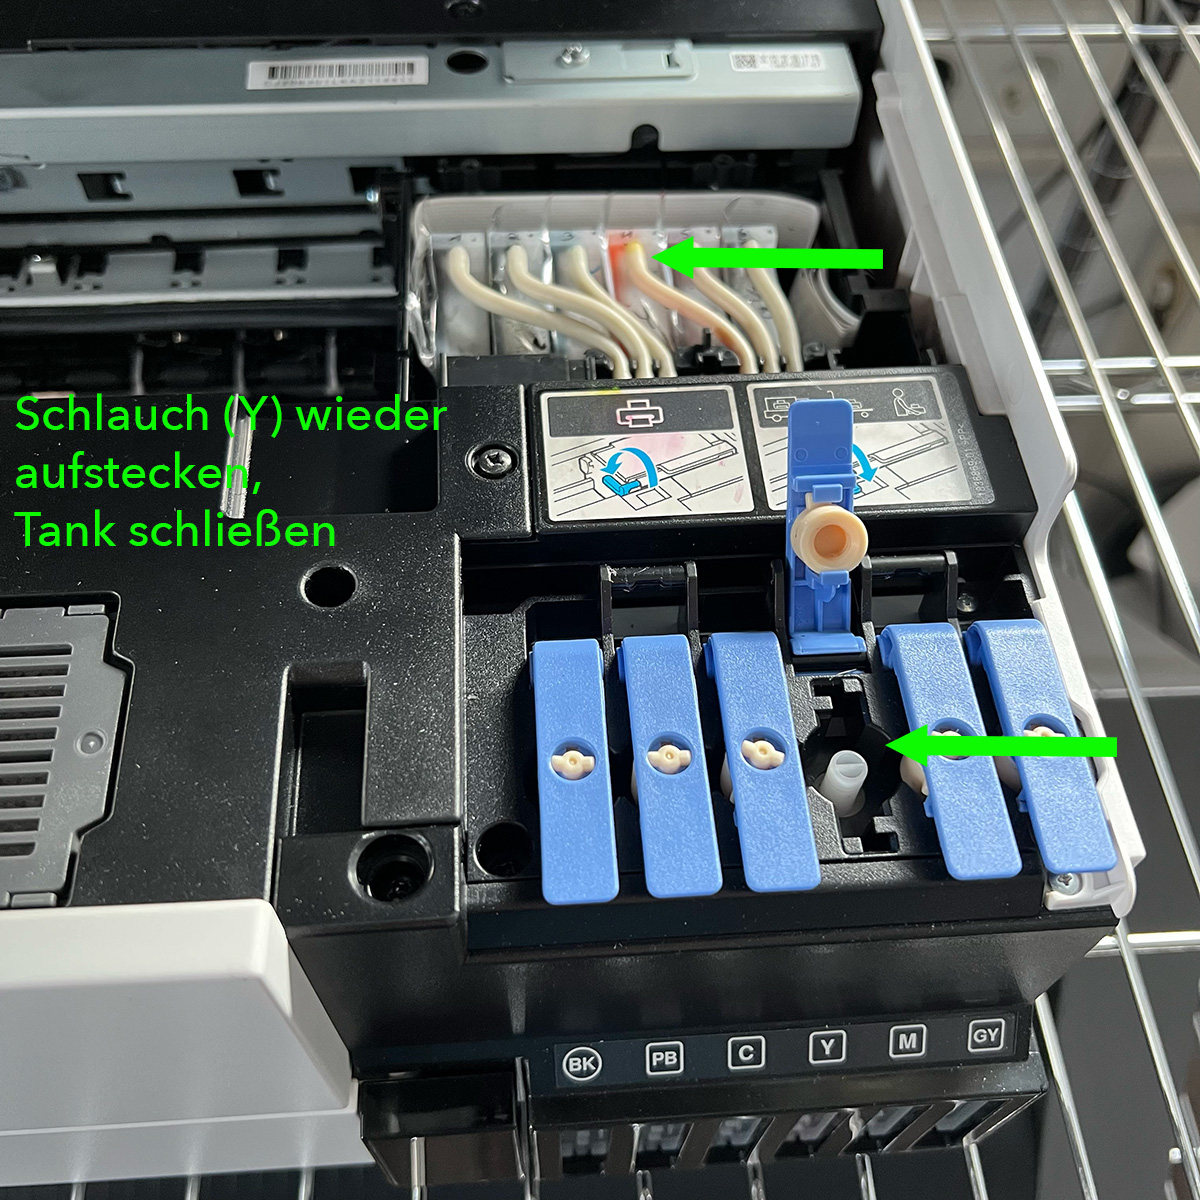
Now refill the tank with new ink. Once the tank is full, remove the syringe and insert the hose back onto the connection on the print head carriage.
Reattach the cover to the print head carriage, then the narrow cover on the left side of the printer goes back into place. Now push the print head all the way to the right until it stops! Then the power cord can be plugged back into the back of the printer and the device can be turned on.
After all tanks have been filled, we performed about 3-4 nozzle cleanings until the nozzle test pattern was complete again. When changing ink, some air enters the ink line, which is gradually removed during the nozzle cleanings. Once the nozzle pattern is complete, we printed about 10 sheets of plain A4 copy paper in full color to complete the ink change.
Disclaimer
We hereby expressly state that the manipulation of ink cartridges and printers is done at your own risk, and we assume no liability for any damages or injuries resulting from the use of this guide. The instructions and suggestions provided above are meant as recommendations, and their use is entirely voluntary and at the discretion of the user. We accept no liability or guarantee for damages or consequential damages to printers, printer parts, tools, furniture, or products used from farbenwerk. There is always a risk of damage when working with printers or printer parts due to improper handling. We explicitly disclaim any responsibility for covering costs or compensating damages (e.g., printer downtime).


